frankie
Contributing Member

Posts: 17
|
Post by frankie on May 2, 2007 2:41:38 GMT -5
|
|
|
|
Post by herron on May 7, 2007 14:55:28 GMT -5
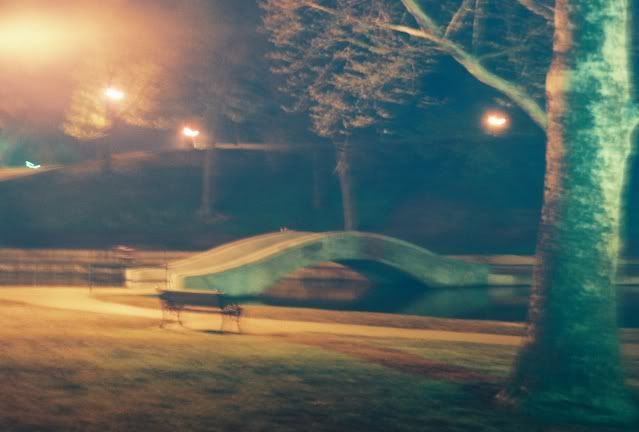
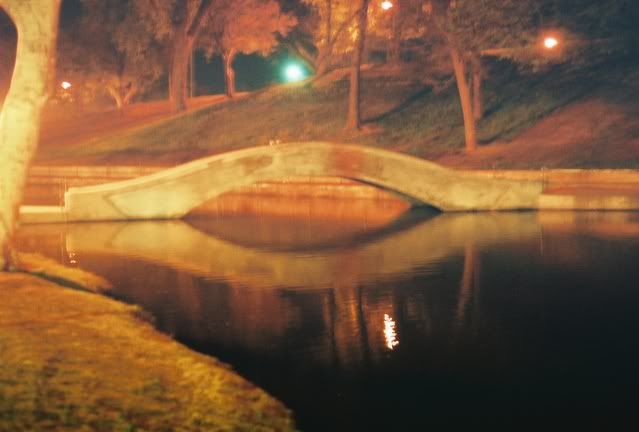
I've hesitated to reply...but you did post these in the section looking for critique.....  I think the first and third shots have the best overall composition going for them, but these are all obviously "night" shots taken hand-held. I think you would have been a lot happier with a tripod for steadiness, and an even longer exposure. I'd make an effort to go back and try it with something to steady the camera...night shots can be fun to experiment with! ----- edit: This image was taken after the sun went This image was taken after the sun went
down. There's just enough incidental light
left to see a faint shadow on the ground.
It's a 4-second exposure on Fuji Superia
100, using my Mamiya NC1000 with 50mm
CS lens @ f/16...mounted on a tripod.
Used a cable release to keep from causing
any camera bounce when the shutter
was released! |
|
frankie
Contributing Member
Posts: 17
|
Post by frankie on May 8, 2007 13:18:53 GMT -5
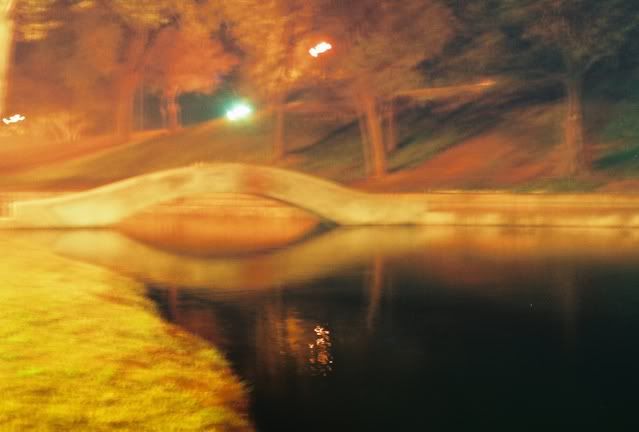
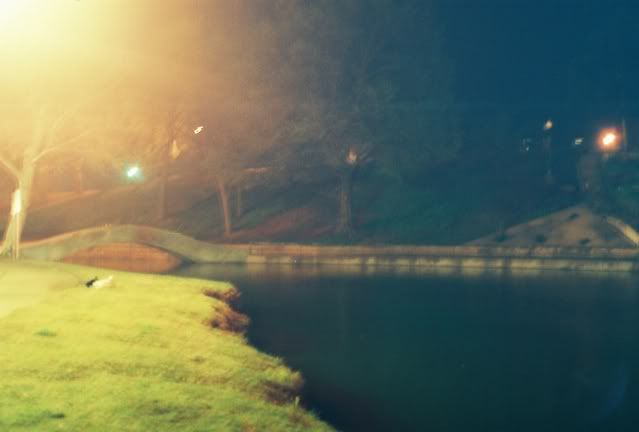
thinks i my sis has my tripod in tulsa i am going to try and get it this weekend and retake the shots.. whats a good way to avoid burn out from the lights, like you see in the 2nd and 4th pic.
|
|
|
|
Post by herron on May 8, 2007 14:18:38 GMT -5
Sometimes neutral density filters can be a great help. They are supposed to just reduce the light, not change the colors. There are different types of such filters: where either the whole filter is grey or it's graduated, from much darker at the top to clear at the bottom. With a neutral density grey filter, you can make the brightest part darker (in most cases this means the sky), which automatically means that the dark parts will be exposed longer. Sometimes this is a great way to deal with subjects that would otherwise be impossible to handle. This may not be the right size, but here is a link where you can start searching for affordable ND filters, if you're so inclined.  |
|
mickeyobe
Lifetime Member
 Resident President
Posts: 7,280
|
Post by mickeyobe on May 8, 2007 15:33:57 GMT -5
frankie,
I would like to suggest that, when taking scenery, you set your distance on infinity and not try to focus at all.
If you don't have a tripod and cable release try bracing your camera against a wall or a tree or any other rigid support.
The best way to avoid burn out from the lights is to exclude them from your picture.
And do by all means try bracketing your shots. One right on your estimated exposure. One under your estimate and one over.
Keep trying and you will soon be making technically perfect pictures.
Mickey
|
|
frankie
Contributing Member
Posts: 17
|
Post by frankie on May 9, 2007 3:52:00 GMT -5
thinks. those are great tips, i cant wait to try them. the other week i won an auction on ebay , it has a telesoping zoom lens some filers a flash, and an extra camera. i feel like i'm starting to get a feel for the "look" of the picture composition wise, so i am anxious try try those other things. btw, herron you use a nc1000 in your oppinion what is the optimal setting for night photography.?
|
|
|
|
Post by John Parry on May 9, 2007 7:28:32 GMT -5
Hi Frankie,
You're doing exactly what's needed to improve - trying things, seeing what works and what doesn't. Keep it up!
These all suffer from the fact that your camera is seeing things differently from your eyes. With a long exposure, the sodium lit areas become fuzzy. I bet they were crystal clear to look at? Take the third shot - the one that 'worked best'.
Remember that your camera was metering the central portion of the picture. But you have a brightly lit tree off to the left, which the camera isn't taking account of. So it ends up dominating and distorting the rest. If you had moved to the right, and got the tree out of the picture, the rest would have sharpened up I bet. Also, as Mickey says, if you had got down lower, you might have got rid of a couple of those lights behind the skyline. And although I don't think they look too bad, setting the lens to infinity would probably have sharpened them up and made them into highlights. (It's notoriously difficult to focus in poor light - I'm hopeless at it, so if you can, again as Mickey says, make sure that your subjects are distant so that setting the lens at infinity takes the guesswork out of it).
Keep experimenting!
Regards - John
|
|
|
|
Post by herron on May 9, 2007 13:35:22 GMT -5
....btw, herron you use a nc1000 in your oppinion what is the optimal setting for night photography.?..... Frankie -- without trying to be evasive... it depends. In the example I posted (which was taken in deep twilight after sunset, not in the dark dark) I was very interested in seeing if I could capture the distant tree line...hence my choice of f/16 for the aperture setting. My focus was actually not infinity, but about 1/2 way into the scene, as I wanted the foreground tree to also be nice and sharp. See my "How To" page on Depth of Field. Looking at the type of images you were intent on capturing, I would venture to say that a smaller aperture (f/16, f/11) would give you the greatest depth of field, and is probably the way to go for the best results. And an infinity setting would likely work the way you wanted it to on all but the first shot. On the other hand, if your primary subject was nearer at hand, and the background unimportant, I would use a much larger aperture (f/5.6) and a correspondingly faster shutter speed to make the background blur and the subject stand out even more. See Understanding Exposure. Another factor to consider is an esoteric concept called “ reciprocity failure.” Normally, you can easily make use of different combinations of exposure time and aperture. However, for very long exposure times film behaves differently, and doubling the exposure will not make the image twice as bright. Here you will find you may have to voluntarily “overexpose” your photo. And don't try to depend on your light meter for anything except a starting point. Unfortunately, different films behave differently, so the best approach is to take several pictures of the same image with different settings (bracketing, as Mickey pointed out). I think you will find that stabilizing your camera, and bracketing your shots, will yield results that may seem incredible. Also, in night scenes like this, the lights act much the same as the sun, and cause a flare when pointed almost directly at the lens. John's caution to keep some of them out of the frame is well taken...but they don't have to be eliminated entirely. You'll find them much more palatable when the overall image is sharp and exposed properly. Both Mickey and John said it well...you are on the right road...keep trying different things to see what works the way you want it to. Most of all, have fun doing it! Good luck. Looking forward to your next set of pictures! ----- BTW -- it's good to get into the habit of carrying a small notepad to record things like your aperture settings, exposure brackets, film used, ideas that occur, info about the site or subject, etc. It can seem like a nuisance, but you'll be glad you did. |
|