|
|
Post by John Parry on Feb 15, 2009 21:11:32 GMT -5
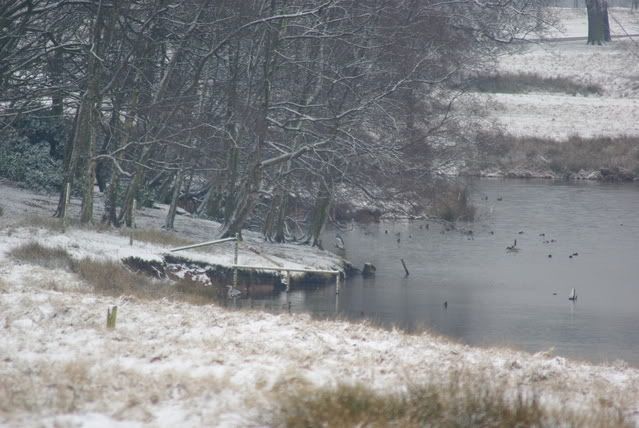
OK - you'll need good eyesight !  I was taking the picture to get the one coming in to land. I only noticed the one on the bank later! Regards - John |
|
PeterW
Lifetime Member
   Member has Passed
Posts: 3,804
|
Post by PeterW on Feb 16, 2009 15:33:24 GMT -5
John,
!
Better eyesight than my poor old eyes give!
I first thought "You might have given us a chance and taken it in colour". Then I realised it IS in colour! Just mono-like winter light.
Can't see one on the bank anywhere. I can see something that looks a bit like a baby penguin, in the water just to the right of the three trees. Then there's something further to the right that seems to be creating some sort of wake on the water. Then again there's something that looks somewhat bird-like further down in the small inlet.
People with better eyesight than mine might spot the two you mean, but if not can you put arrows to them in PS and post it again?
peterW
|
|
|
|
Post by John Parry on Feb 17, 2009 8:50:18 GMT -5
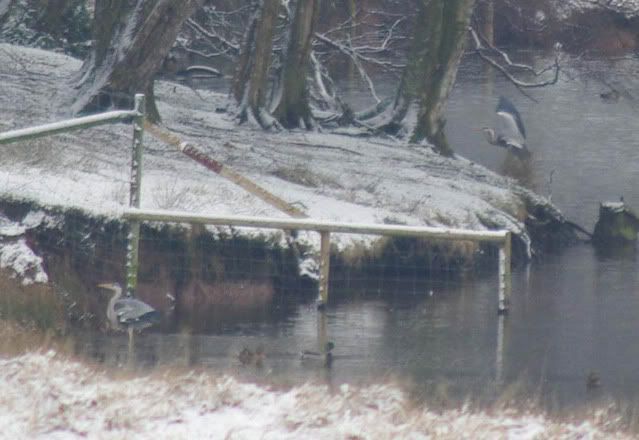
Sorry Peter I thought fine, no problem. Then I realised I hadn't a clue how to superimpose an arrow or circle the birds. I really must read the manual one of these days... (As my son says, "Manuals are for girls" LOL) Here's a blow-up. I can do that!  This is with the zoom at 320, so it's quite a high magnification. The reviews say the lens is a bit soft at the extreme setting, and so it is. But it was hand-held and it was freezing, so I'm not too displeased. The anti-shake worked just fine! Regards - John ps WRT to the other thread, it's true. It's about £200 worth of software and I don't have a clue what most of it does. This is PS7 but it came on the PC and does dodgy things if you press the help key. I don't want to push it! |
|
PeterW
Lifetime Member
   Member has Passed
Posts: 3,804
|
Post by PeterW on Feb 17, 2009 15:14:21 GMT -5
John:
Thanks for the blow-up. I can see them now.
There's a saying "When all else fails RTFM". The RTM stands for Read The Manual.
Actually I haven't found Adobe's Photoshop manual all that useful. It tells you what the features do, but doesn't really tell you how to use them. There are much better books around about using Photoshop. Or you could Google for Photoshop Free Tutorials. There are some quite good ones out there.
Best of all, once you've learned the basics about what the functions do, play with them and try things out. The best way to learn is by your own experience.
Just a tip: Before you start working on a picture go to 'Window' at the top of the PS screen and open the Layers sub-window (or press F7 on later versions). You'll see that whenever you add something like text, or an arrow or a line to a picture it creates a new layer. Think of a layer as a transparent gel laid over the original picture. To add something else you have to click on Background (the original picture) in the Layers window. If you want to alter or add to one of the layers just click on it in the layers window and it will come up. You can also call up a new layer whenever you want to try out an idea.
You can if you want save the original and all the layers as a PSD (Photoshop Document) and go back to it later, but saving it with a lot of layers creates a humungus great file. I usually merge all the layers before saving (I also do this sometimes when I get too many layers to keep track of them). Go to the little ikon in the top right of the Layers window and click on it. At the bottom of the menu you'll find 'Flatten Image' This puts all your layers into the background picture and you can save as a normal JPEG (or TIFF if you like using TIFFs). You can also do this from one of the items on the menu bar at the top of the PS window, but I find the Layers window more convenient.
Getting used to using Layers is one of the most useful PS techniques I know. The beauty of them is that you can try out ideas without affecting your original picture. If you make a complete hash of a layer just click on it and drag it into the little trash can symbol at the bottom to get rid of it.
peterW
|
|