PeterW
Lifetime Member
   Member has Passed
Posts: 3,804
|
Post by PeterW on Feb 25, 2010 12:10:34 GMT -5
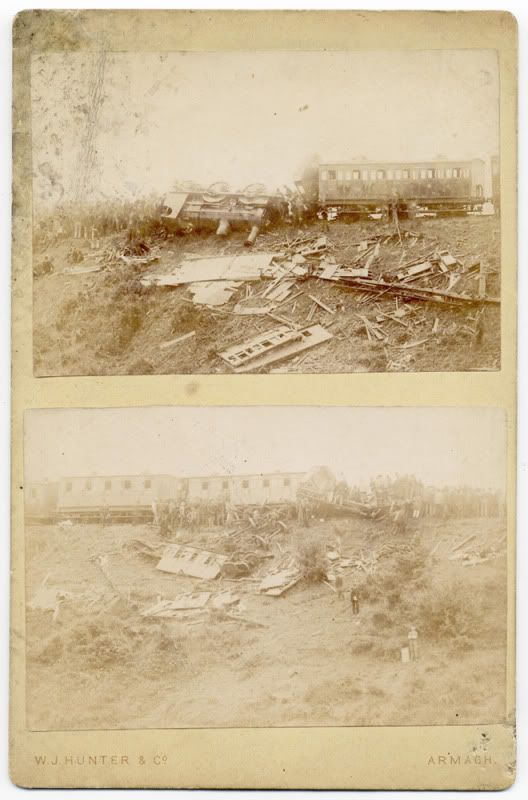
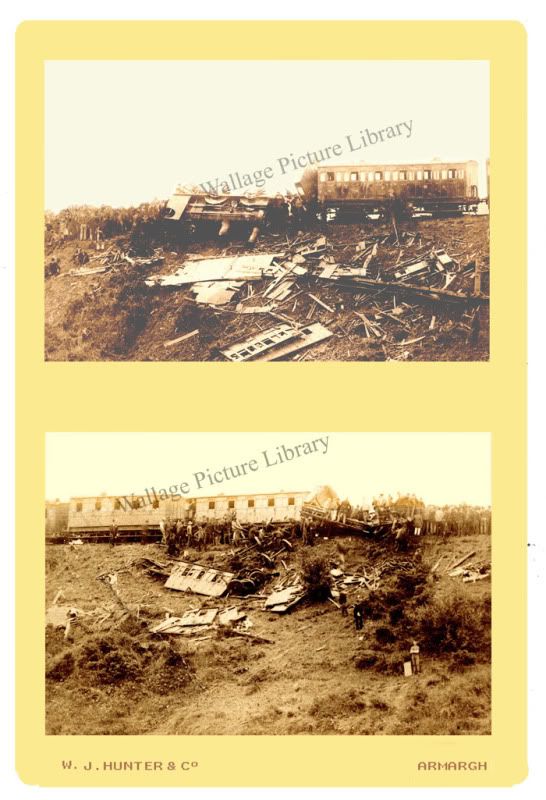
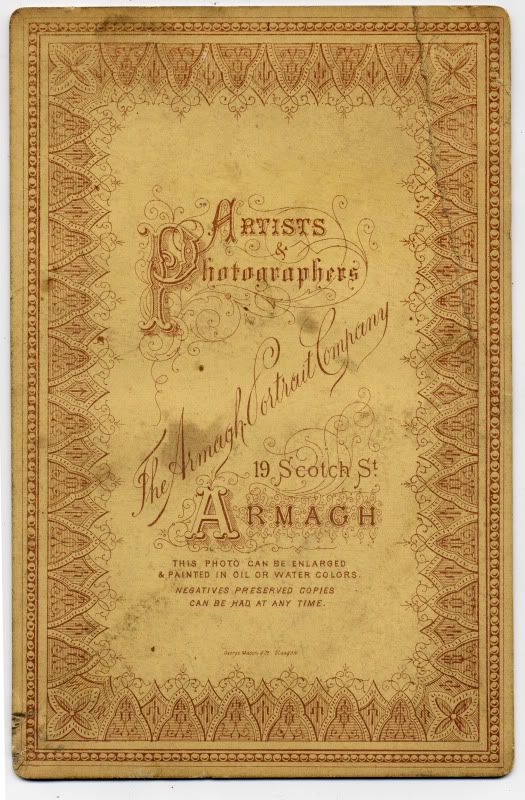
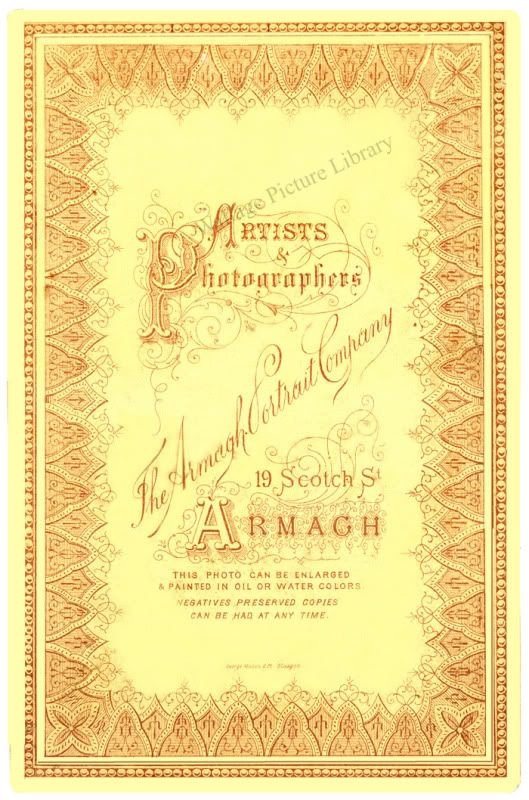
Hi all, Following on from the discussion about PS in another thread, this afternoon I finished restoring an old photo postcard. When I got it at a flea market I was told it had been stored with other ephemera in box in a damp garage. It was suffering from mildew, front and back, and I had to let it dry out before I could scan it. It's a couple of pictures taken by a local photographer of the train crash in Armargh, Ireland, in June 1899. The originals were printed on a thin albumen paper, trimmed (not too carefully) with scissors and stuck on to the photographer's standard postcard mount. I gave 20p (about 30c.) for it. When I searched on the net to find the date I found only one site that had the same pictures in B&W. No other sites had any pictures, so I decided to have a go at restoring it. The whole job, front and back, took about four hours. Here are "before and afters". Any comments? PeterW  Front before  Front after  Back before  Back after |
|
|
|
Post by Randy on Feb 25, 2010 12:33:34 GMT -5
Wow, nice job!
|
|
|
|
Post by nikonbob on Feb 25, 2010 14:22:09 GMT -5
Looks good, a job like that takes quite a bit of skill and patience.
Bob
|
|
mickeyobe
Lifetime Member
   Resident President
Posts: 7,280
|
Post by mickeyobe on Feb 25, 2010 14:25:48 GMT -5
That restoration is a near miracle.
Really impressive.
Mickey
|
|
|
|
Post by herron on Feb 25, 2010 15:48:01 GMT -5
I sometimes add a gradient of some kind to skies like that, to make them feel less stark (even if the originals were truly blown out).
But this is a very nice restoration.
|
|
PeterW
Lifetime Member
   Member has Passed
Posts: 3,804
|
Post by PeterW on Feb 25, 2010 18:01:57 GMT -5
Thanks, guys. I enjoy doing things like this - when I can't get out to take some decent pictures. It's not very strenuous and keeps me occupied instead of reading or being stuck in front of the TV.
The weather here has been miserable for the past 10 days or so, either chucking down rain and windy, or that fine sort of drizzle that makes you wetter than you think it will. I did take a camera out the other day, and then spent half an hour drying it off.
Ron,
I thought about doing something like that, but as these pics are going in my commercial picture library I left the skies blank as they would have been in the originals.
In 1889 dry plates were well and truly established, but emulsions hadn't developed very much. They were either classed as "ordinary" ie sensitive to the blue end of the spectrum, or were early orthochromatic which, despite their name weren't really ortho anything. They extended the sensitivity a little way down the spectrum but not as much as later ortho plates and films of the 1920s. Reds still came out black, browns were too dark and greens were too light.
This was one of the reasons for the popularity of sepia toning, it quietened down the "soot and whitewash" look of black and white prints which you can see in any book about 19th century photographs.
The average commercial photographer in the 1880s seldom bothered to dodge and burn under the enlarger. Indeed, most prints were contact prints on POP (Printing Out Paper), printed in frames by daylight and then toned either black and white or sepia.
Some POP paper emulsions were classed as self-toning. They printed to sepia by daylight and just had to be fixed in hypo, but the sepia toning soon faded to yellow if the print was left in the light, like a display frame.
Picture researchers with publishers and TV companies that use "history" pictures are pretty clued up on the history of photographs. Some are very traditionalist and don't like any restoration at all. They don't even like modern prints from old negatives.
Others, a growing majority, prefer pictures of old photos and engravings to be restored as near as possible to original unless they are very rare and have some special historical significance as documents.
You can't please all of them all of the time.
PeterW
|
|
Deleted
Deleted Member
Posts: 0
|
Post by Deleted on Feb 26, 2010 12:58:14 GMT -5
In my job (from which I am retiring in less than a month) I spend a lot of my time cleaning up old photographs and maps from the early days in the American West. The cloning tool is one of the most vauable in digital photo processing. One of my most memorable projects was a old time panorama shot of a company of soldiers from the early 1900s. The front row was kneeling and one poor fellow's right leg had mildewed clean off. I found a kneeling trooper at the other end of the line, cloned his leg and put it on the one who had lost his. Too bad it's not that easy to replace a real life leg.
Wayne
|
|
photax
Lifetime Member
  
Posts: 1,915
|
Post by photax on Feb 26, 2010 13:26:43 GMT -5
Peter, thats a wonderful restauration ! In the light of that tragedy, the notice on the backside " This photo can be painted in oil and water colors" becomes farcical. Dont want to have this theme as an oil painting on my wall. Thanks for showing and keeping the history alive !
MIK
|
|
PeterW
Lifetime Member
   Member has Passed
Posts: 3,804
|
Post by PeterW on Feb 26, 2010 18:57:32 GMT -5
I have to agree with you, Wayne, about cloning. It's invaluable in restoration work, but many people think only of using the "rubber stamp" cloning tool. This is fine for taking out spots etc, but its round shape is a drawback for more extensive work.
More and more I find I'm using the pen tool to outline the part I want to clone (I find it more accurate and easier to control than the various lassoos). After outlining I 'make selection', copy it, use the move tool to take the 'marching ants' to the new place and paste, nudging with the arrow keys if necessary. It's still cloning of course, but you have to do it step by step instead of letting the rubber stamp do most of it for you.
I find the pen tool incredibly useful for all sorts of jobs. After outlining you can put handles on any of the little squares and bend the outline suit just about any curve you like.
It's such an easy tool to use. You can even have two windows open with a different picture in each and clone parts from one to the other. Yet many of the 'standard' books on PS mention the pen tool only briefly and make it sound very complicated to use.
I also use layers a lot as a safety net, a new layer for each major alteration. Then, if I make a complete boo-boo of something, which is far from unknown, I just drag that layer to the trash can and don't lose previous work.
PeterW
|
|